
OOPS! I can’t unscrew the abutment !
One will never forget the first time this happens. A few futile attempts, the first cold sweat and soon the moment you feel helpless, as you realise that the more you try the higher the risk to make the damage worse..!
Don’t let it catch you by surprise..! You can be prepared to deal effectively with such complications!
When does it happen?
Typically, in referred cases we see for the first time, but also has happened in our own cases. Most frequently it is with permanent crowns that have been sitting for a few years, but could be even a temporary. It could be due to damage in the screw head from accidental drilling, or could be wear after several times of placing and removing the prosthesis, especially if the screw is not an original or the indicated one. In all cases the result is the same: The screwdriver does not have enough engagement to turn the screw head, applying torque might spin it and damage the internal part of the screw head even further...
What to do if it happens?
Well, if you run an implant referral practice, it’s more like “when” it happens rather than if. There are several “layers” of reaction!
At first:Take a deep breath, take your eyes away from the implant and get all essential documents. If the patient is not your own, make sure you have the detailed history of the implant, including the type of all components. If not available, at least make sure you have a very good periapical radiograph.
1. Check all you can of the history. Anything that speaks of risk? Recent repair or replacement? Lack of follow up for long periods? Unidentified components or risk for generic components? Such details can help you sort out a possible unexpected component and direct your focus to potential damage or wear. Typical risk for damaged screw head is an unusually short access screw hole or an angled abutment for screw retention. If you see a very short crown in the radiograph, be very mindful.
3. Look carefully under strong light and magnification. If you have an operative microscope in the clinic, such moments is what makes the investment really worth while! If not, use loupes and strong light. Can you see the screw head? Does it look as you expected? Look for “shiny” areas which mark drilled or worn out parts. A common problem we have seen is when a lab screw is accidentally used in the patient. You can get a hint by the colour of the scew and the length in the radiograph.
5. Do not force it and do not try to torque it out with pressure. If your screwdriver does not engage with light force, do not keep trying, as the risk to cause more damage is high. Time to get help.
When to call in the cavalry?
2. a rescue operation in such cases is complex, requires experience, good magnification, time and most likely a good rescue kit with some gadgets.
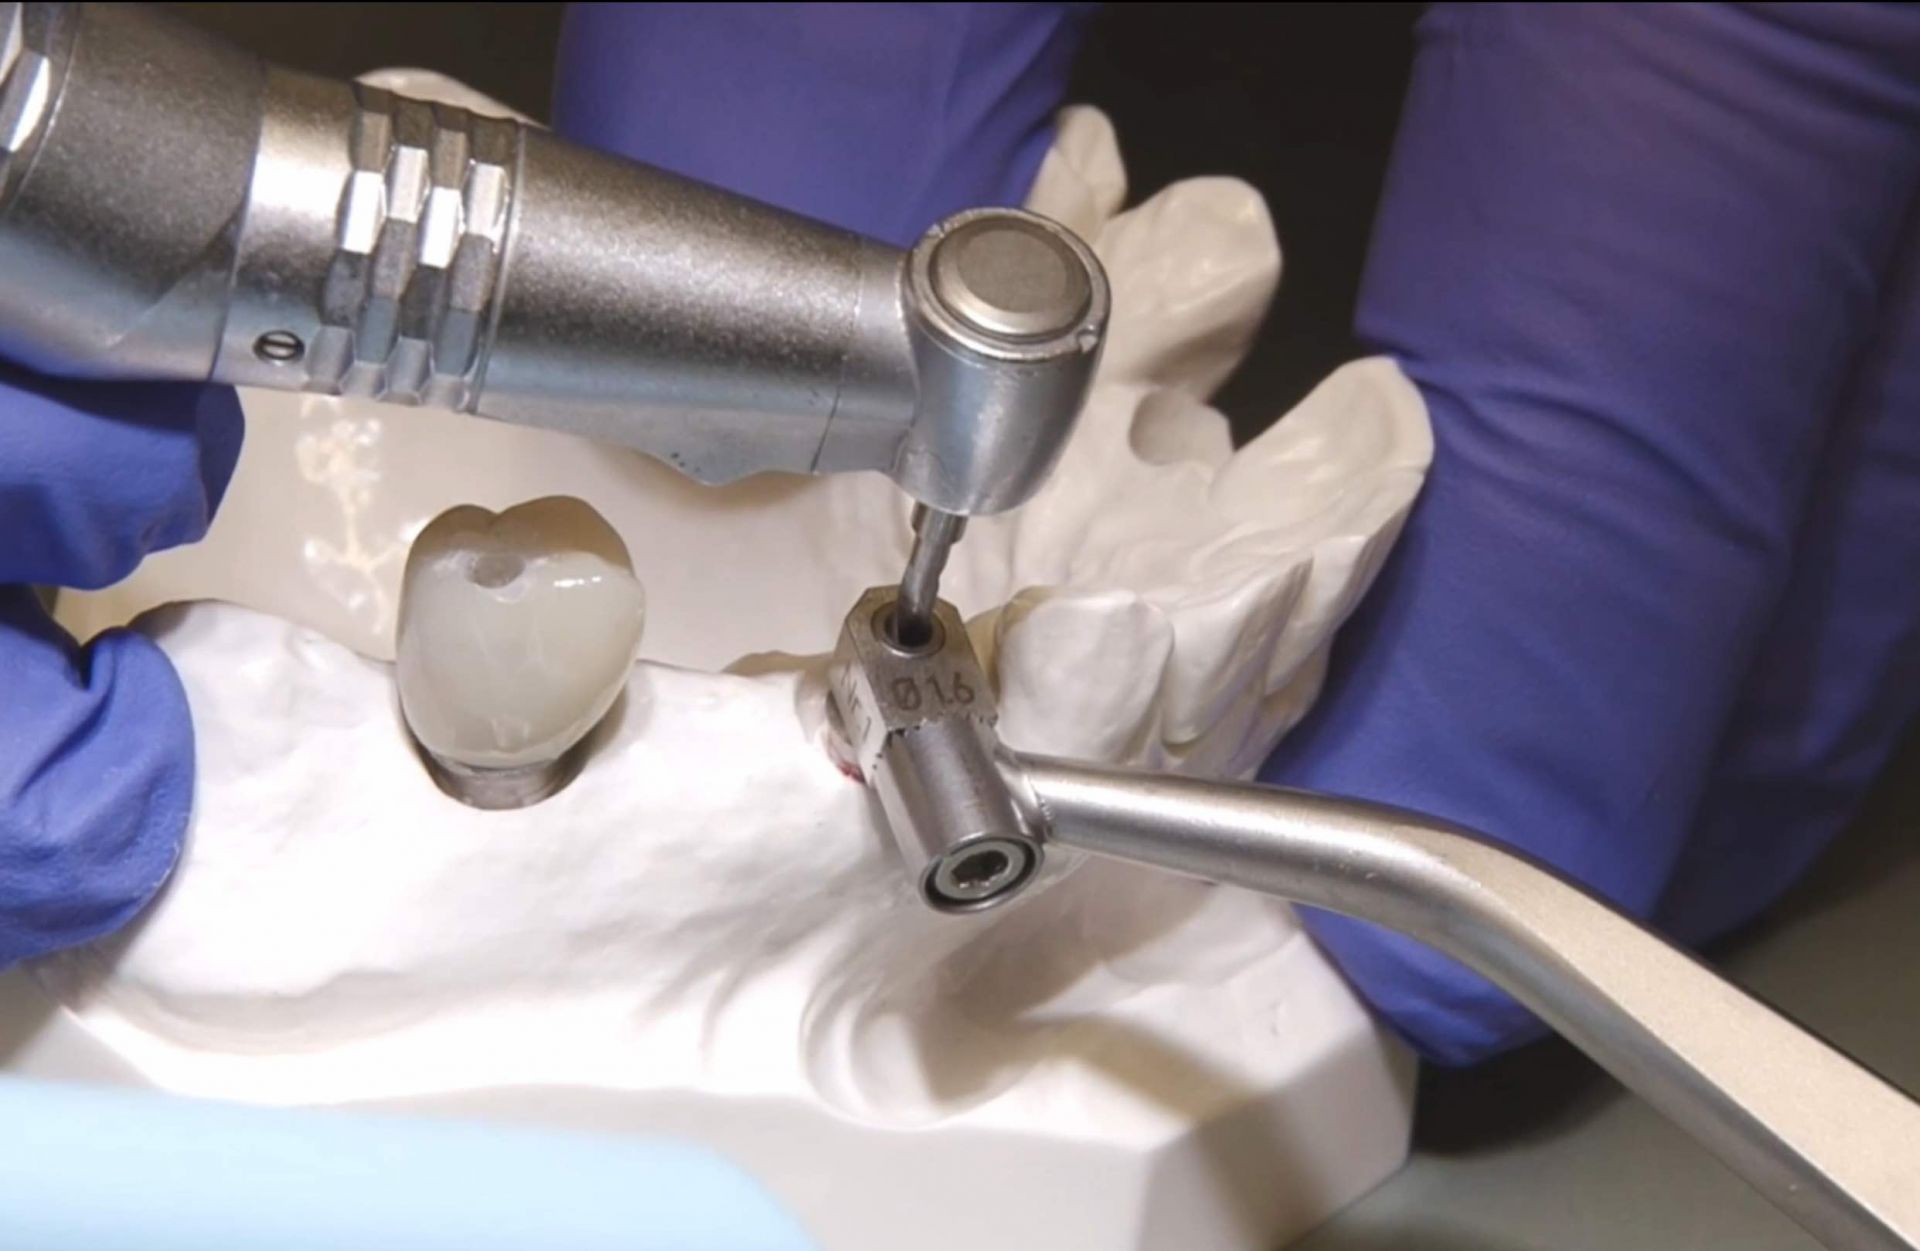
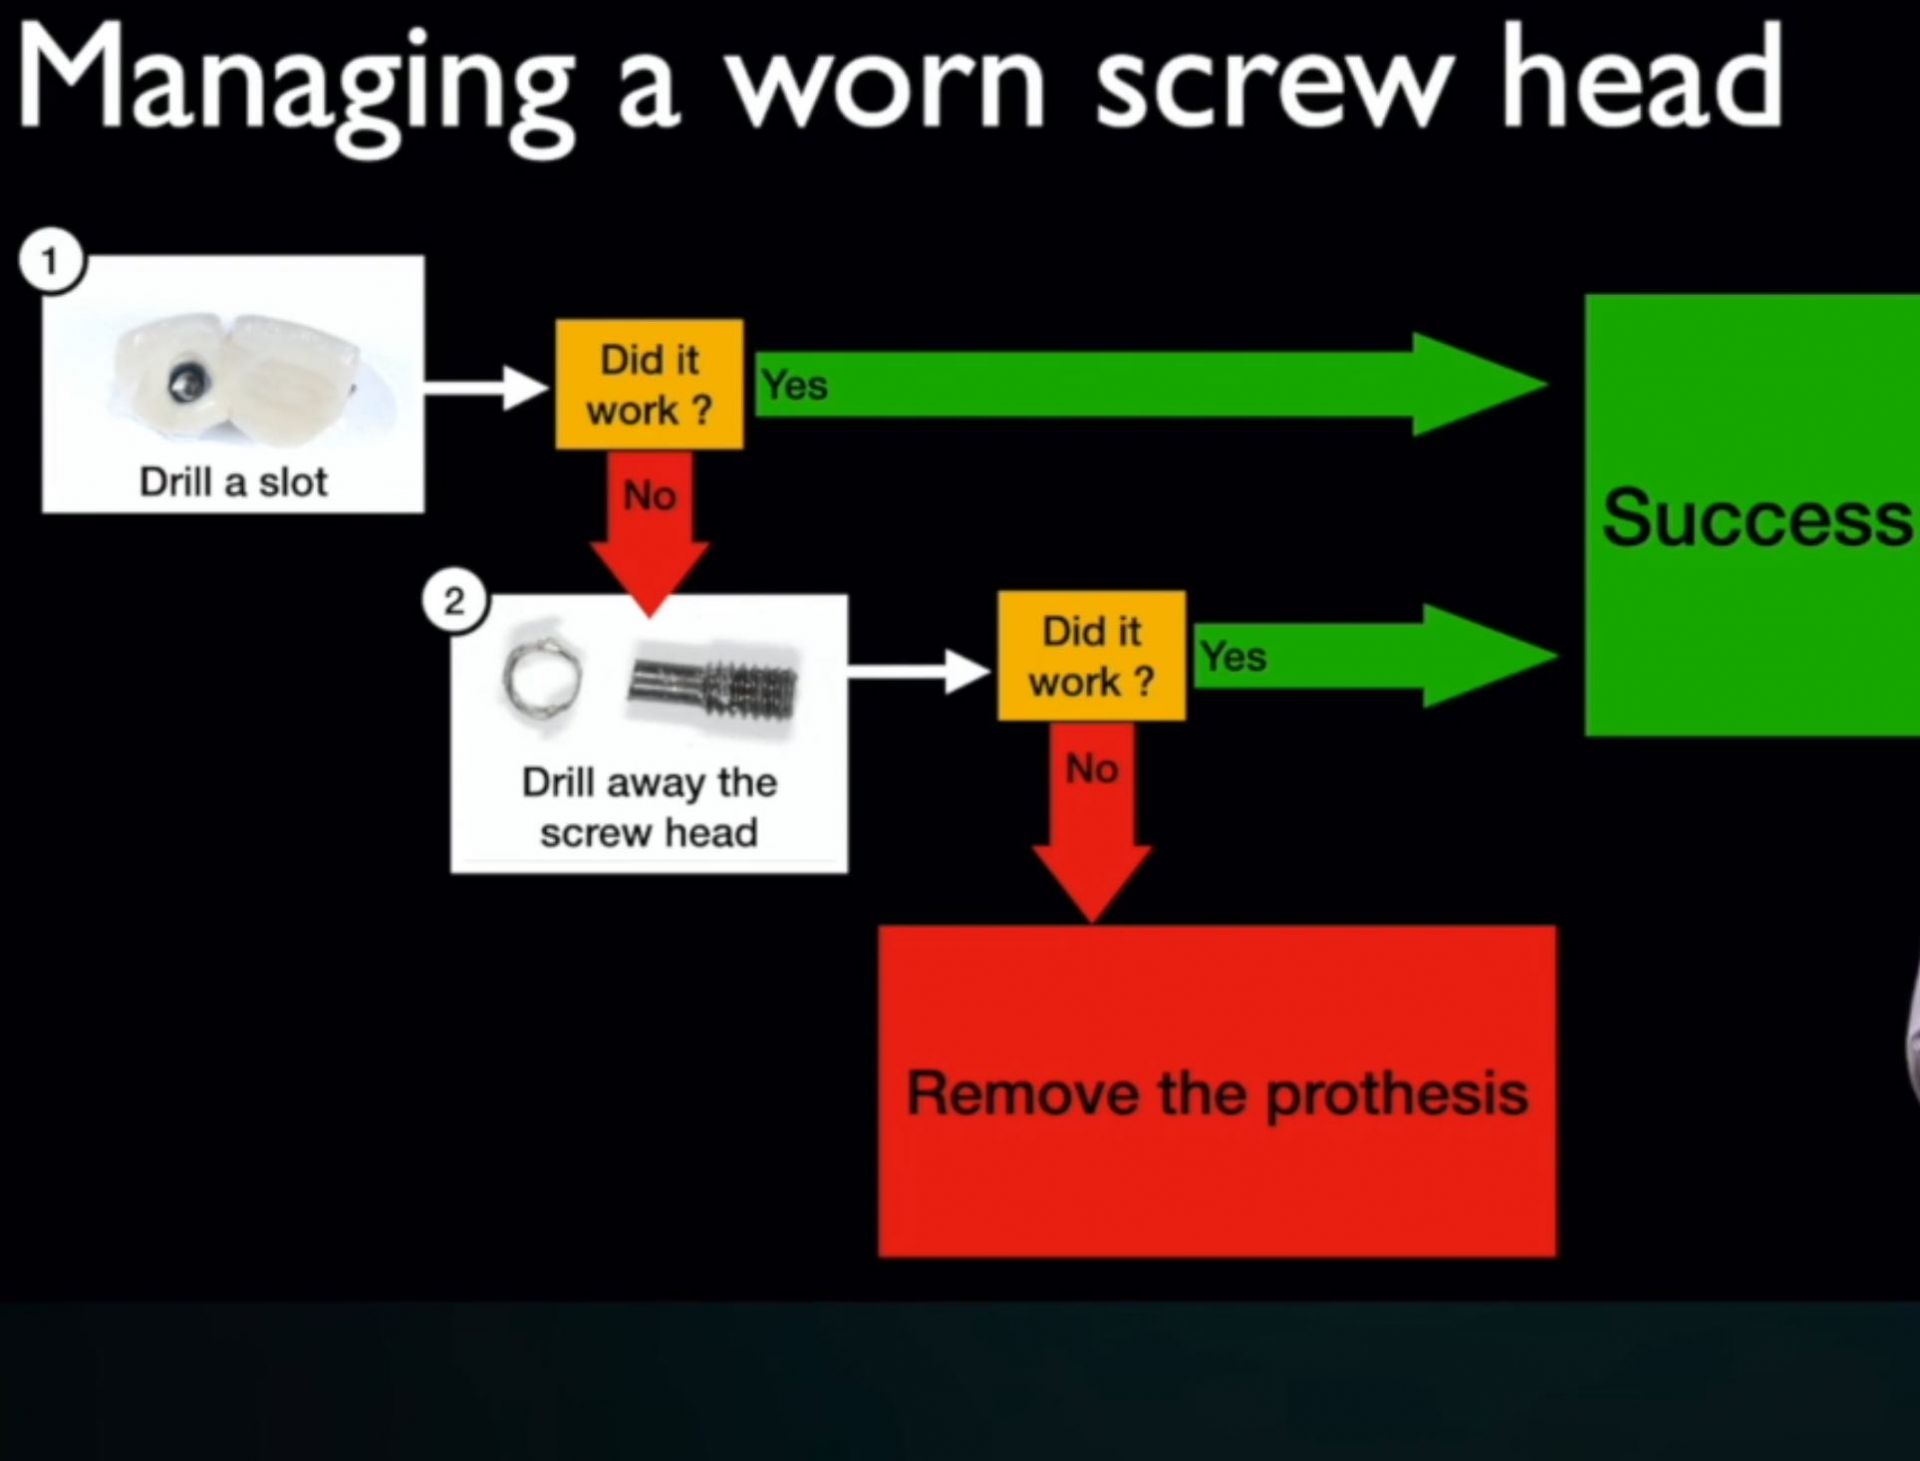
3. There are two main strategies, one is to drill a “slot” on the screw head and then unscrew it with a proper slot driver, or if not possible to drill the whole screw head out. Both are very high precision operations, because of the risk of potential damage of the internal connection of the implant.
4. If you have not done it before, ensure you master the process before you start and get help from a more experienced colleague! You can learn more about how to design and execute resque operations in the step-by-step videos of Dr. Janda!
Like always, prevention is the best strategy, so make sure you follow some simple rules:
1. Use only quality, branded components and make sure the abutment screw is new (in the pack) when you deliver the prosthesis.
2. Use proper isolation for the screw head. Silicone tube or tape, properly packed can protect the head from accidental drilling.
3. Give proper height to the screw access hole and repair the filling immediately if it fall out or gets lose.
4. Always give an implant id to the patient, with details on all components!